First you have to write the downloaded image in to a cd ROM. Nero buring rom or Roxio will do it for you. If your not aware of these programs go here to have a look at this article which tells how to burn an ISO image.
ALWAYS perform a backup before any partitioning operation. This is particularly important when moving a partition, or shrinking a partition from the left side. The left side of a partition is generally where most or all of the data resides. The right side is generally free space. But it important before performing ANY partitioning operation involving already existing partitions.
You need to create some free space in your hard disk in order to install the Ubuntu, to do so firstly check for your hard disks partitions, go to disk management.
If there is unallocated space if its enough for your new linux operating system (you need at least 5GB of free space) simply close the application.
If there is no unallocated space, you can reduce another partition to make unallocated space with free partition editing tool.
I). Installing from the bootable CD.
1. Boot your computer from the CD.
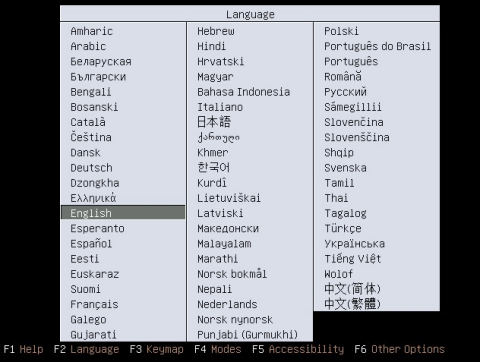
Start or restart your computer. The Language screen appears. If you reboot your computer and do not see the following screen, please refer to BootFromCD

Select your desired language and press Enter. The startup window appears.

Select Install Ubuntu and press Enter. The Welcome window appears.

From the taskbar, choose your preferred language. Click Forward. The Where are you? window appears.

From the Selected city box, choose your closest location. Click Forward. The Keyboard layout window appears.

Select your keyboard layout. To test if you have chosen the correct layout, enter characters in the text box. Click Forward. The Prepare disk space window appears.
If you want to install Ubuntu over your entire hard drive, then Select Guided – use entire disk and select the hard drive that you want to install Ubuntu. Click Forward. The Who are you? window appears.

WARNING: Installing Ubuntu on your entire hard disk will erase all data that is currently on the drive. Including your existing windows installation.
Go here for custom partitioning.
OR
If you want to install Ubuntu on a single partion Dual Booting, Select Guided – resize. In the New partition size area, drag the area between the two partitions to create your desired partition sizes. Click 'Forward. The Who are you? window appears.

- In the What is your name? field, enter your name.

- In the What name do you want to use to log in? field, enter a login name.
- In the Choose a password to keep your account safe field, enter a password in both text boxes.
- In the What is the name of your computer? Field, enter a name to identify your computer.
If you are the only user and wish to avoid the login screen, check Log in automatically (optional).
Click Forward. The Ready to install window appears.

Verify that the language, layout, location, and personal information are correct and click Install. The installation wizard begins.
- When the installation wizard finishes, the installation complete window appears.
Click Restart now to restart your computer. Ubuntu is now installed.

II). Installing Ubuntu from within Windows
No comments:
Post a Comment